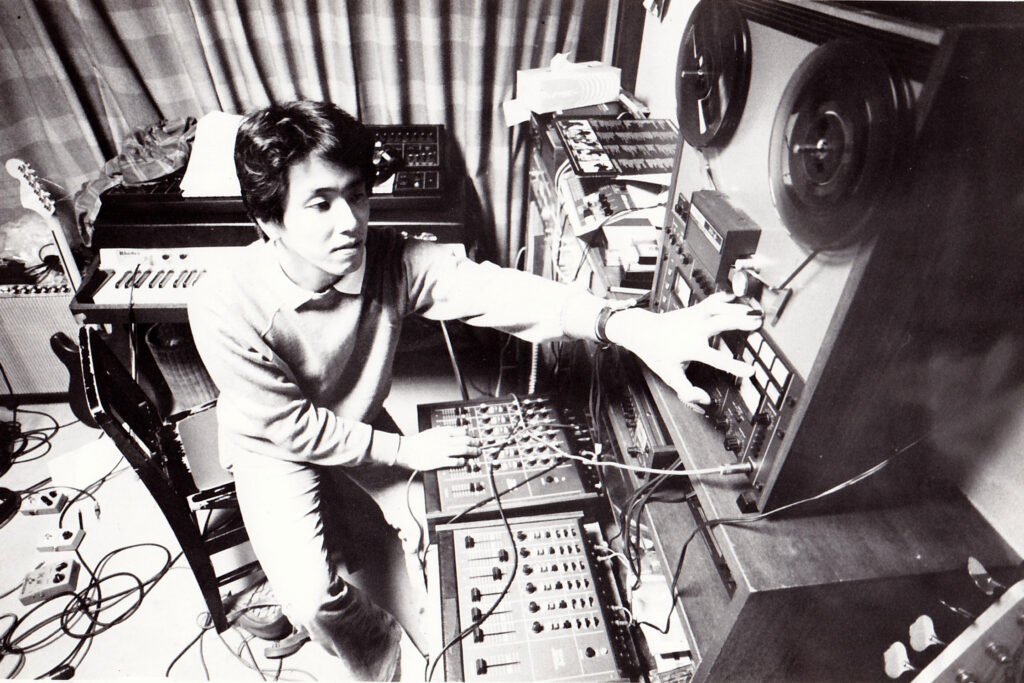
Recording in my room, March 1980 Fumio Miura
In the winter of 1979, I was a senior in college, had found a job, and was vaguely enjoying my moratorium. While I had been active in music since junior high school, playing in copy bands of The Beatles, The Who, and Led Zeppelin, I became interested in home recording and synthesizers in college and began working on multiple recordings of original songs. All of my friends were music lovers, and many of them had experienced some form of musical activity. So, wanting to leave something tangible behind before entering the workforce, I approached my friends about producing a record.
At the time, I was listening mostly to Western music such as Steely Dan, Stevie Wonder, Michael Franks, and the Original Savannah Band, but I was also becoming interested in YMO, Kraftwerk, Donna Summer (Giorgio Moroder) that was playing at discos, and synth techno sounds such as M “Pop Muzik”, etc. Japanese music was limited to Yumi, Arai, Minako Yoshida, Haruomi Hosono, and a few others.
At the beginning of the new year, 1980, we began preparing to make a record with old friends from our hometowns (Nakano and Nerima, Tokyo): Kiyo (Kiyo Nakamura, guitar, vocals), Chabo (Toshiya Hashimoto, guitar, vocals), Takeshi Nakajima (bass, vocals), Tadashi Noguchi (drums, vocals), Reiko Hibino (vocals), Yurippe (Yuriko Yamazaki, chorus), and Fumio Miura ( (keyboards, vocals) began preparations for record production.
Although we had no knowledge of copyrights, we thought it would be difficult to obtain permission for copying songs, so we decided to use all original songs. The common tastes of the members at that time were AOR, soul, jazz, and bossa nova. The members brought together a total of nine songs: four by Miura, two by Kiyo, and one each by Chabo, Nakajima, and Noguchi. Since there was no money to rent a practice studio, they proceeded to write and arrange songs in small room (11 square meters / 118 square feet) of Fumio Miura in Nakano. Tokyo. Although the members had never performed live or engaged in other musical activities together, they were childhood friends and often went out for drives and drinks, so they got to know each other well and were able to get into a good groove.
Since there was not much time left before graduation, I proceeded to set up the recording. Since I could not rent a full-scale recording studio due to the cost, I recklessly decided to record in my room. Although I had been working on home recording, I did not have enough equipment to record a band. Therefore, I rented a tape recorder (8-channel 1/2-inch, TEAC 80-8) and other equipment. Thus, on March 10, 1980, a hand-held recording session began.
The procedure was to use microphones (one kick and two tops) only for the drums, and use lines for the bass, guitar, and keyboards. The basic track was made in a studio live-like manner, and then the guitar was replaced by the sound of the amps. Sound leakage was somewhat controlled by closing the shutters and hanging futons over the windows as soundproofing measures, but it was a big nuisance to the family. The drums and guitar could only be recorded during the daytime, so after the band members left, I overdubbed the keyboards until midnight. Particularly difficult was the synthesizer. We layered the Yamaha CS-30 monophonic synthesizer (which only produces single notes) over and over to create the string sounds, etc. On three songs, we added a brass section, but it was so loud that the headphone monitors could barely hear it, and it was very difficult. In this way, I managed to finish the recording after two weeks of being stuck in my room until the backing tracks, vocals, and chorus were recorded. During the recording process, I discussed with the members and we decided to name the unit “Presents” and the album “Feeling Like A Child”.
Only the mixing was done by renting an outside studio and staying up all night one day to finish nine songs. Yulippe (Yuriko Yamazaki) was in charge of the jacket and label design. After searching for a record pressing company, we managed to deliver the master tape, jacket, and label prints at the end of March, just before I joined the company. The number of copies pressed was 100. I distributed them to band members and friends, but when I ran out, I added another 100. Still, the Presents recordings were never distributed to the general public, and they were left to sleep for the next 42 years.
March 2022
In March 2022, I suddenly received a message from HMV record shop through a junior colleague at my former job that they wanted to reissue “Feeling Like A Child” as a vinyl record. However, it took me a while to realize that it was about an album from 42 years ago, as if I had been bewitched by a fox. After a few exchanges, I began to realize that it was a real story, and that it had been discovered in a used record shop. So I contacted the band members to see if we could proceed. They all readily agreed to reissue the album, but sadly, Kiyo (Kiyoaki Nakamura), the blues-loving, tasteful guitarist and vocalist, died of illness in 2006 at the young age of 49.

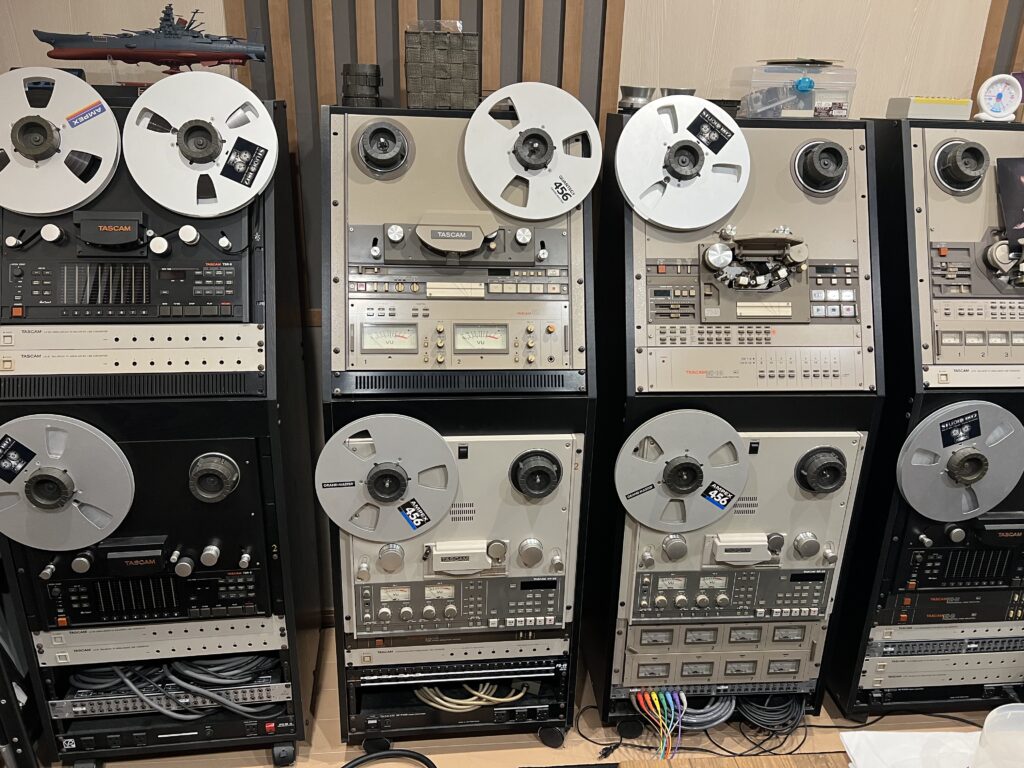
By the way, the process of making a record involves mastering, and the whereabouts of the 2-channel master tape needed for this process were unknown. However, we found an 8-tracks 1/2-inch multi-tape that had not been mixed yet. So, I decided to take the time to refine the mix, which at the time was not satisfactory due to time and equipment constraints.
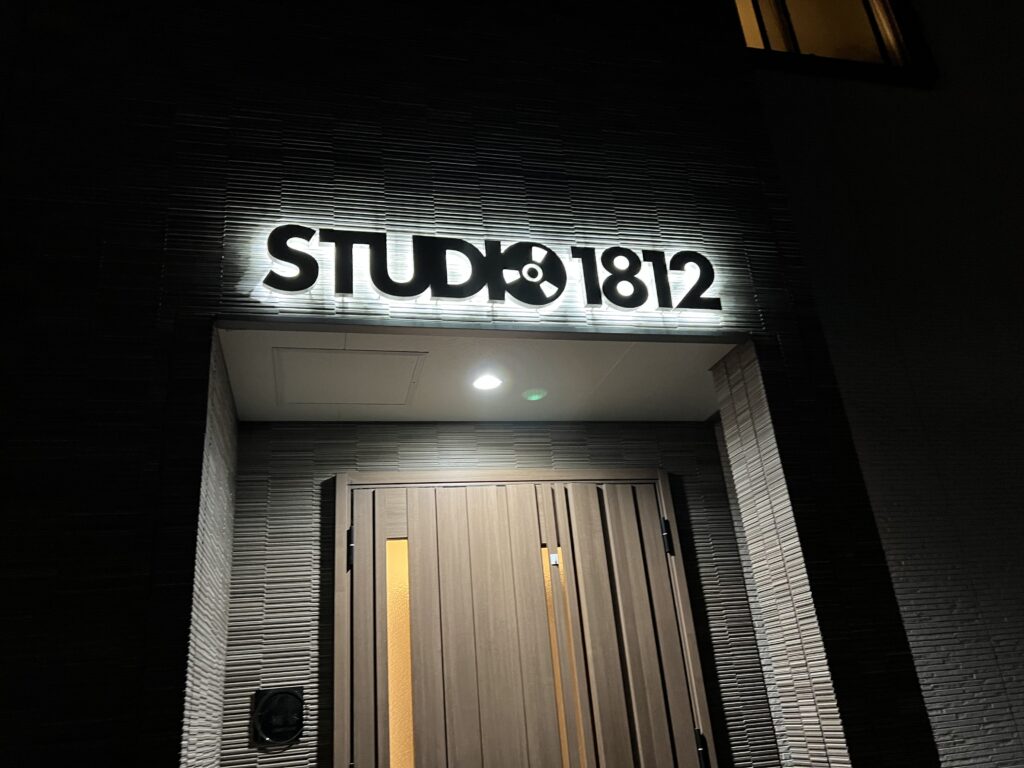
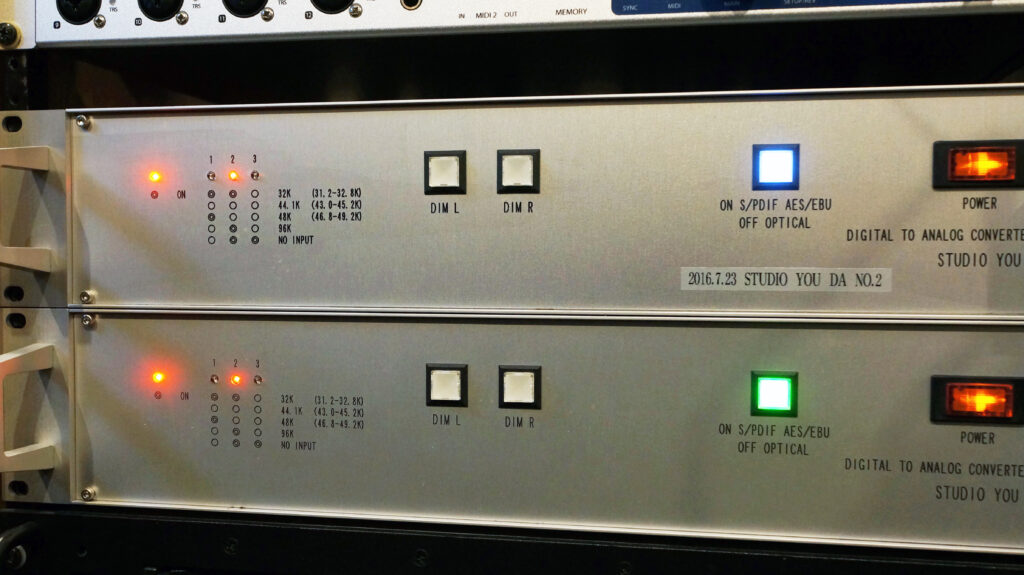
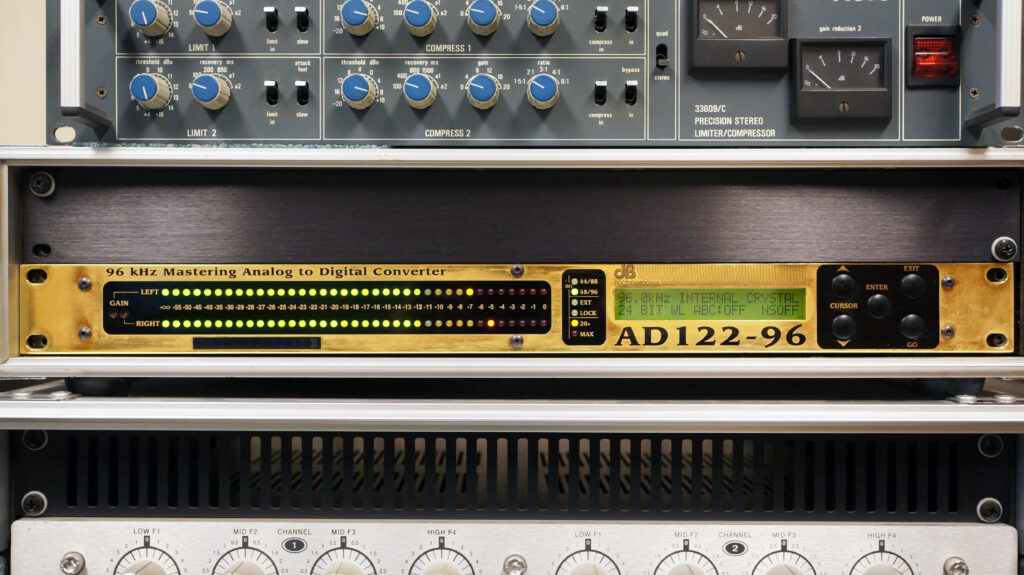
However, the first step is a stumbling block. I could not find an 8-tracs tape recorder to play it back. We contacted the manufacturer, TEAC, but they replied that there were none left. At a loss, I found a studio (STUDO1812) in Nishinomiya City, Hyogo Prefecture, on the Internet, which was engaged in recording with analog tape recorders, and inquired about the possibility of 8-tracks 1/2-inch playback. The 42-year-old tape was partially adsorbed, so after heating it in an oven, we managed to play it back and convert it to 24-bit, 96KHz high-resolution digital data.
In 2012, I moved from my previous position at Dentsu to Kansai University, where I teach in the Department of Media Studies in the Faculty of Sociology. There, I was also in charge of music and video production training, and in 2016 I was involved in the design and construction of the fully digital Kansai University Socio-Acoustic Studio, which is capable of recording and playing back stereoscopic audio such as Dolby Atmos and Auro3D. The practical training was engineered by Mr. Daichi Yuhara of STUDIO YOU in Suita, Osaka, and we asked him to do the mixing and mastering for this project.
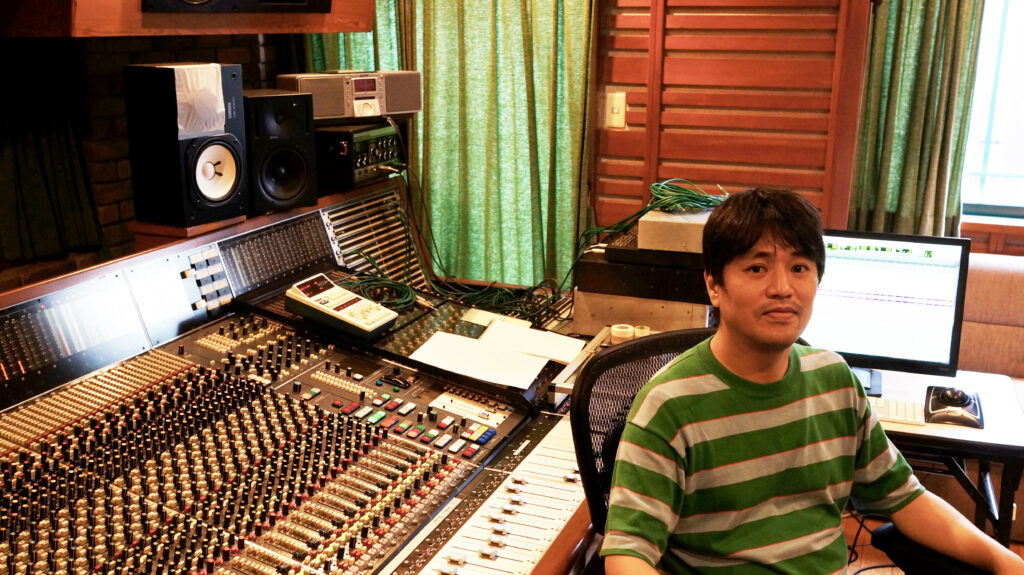
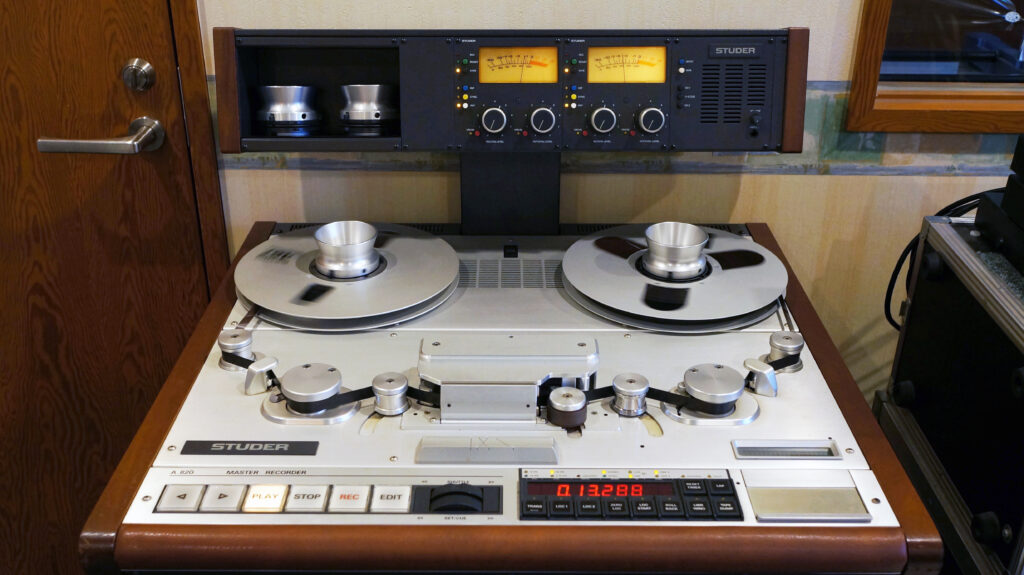
STUDIO YOU is a unique studio with many vintage equipment such as Neve analog consoles, Fairchild tube compressors, and EMT plate reverbs. After the digitally converted data was edited by Pro Tools to remove noise and organize tracks, it was passed through Neve and other analog vintage equipment, and gradually, the nostalgic nuances of the sound were restored. For example, adjusting the bass with the EQ on Neve’s console made it sound nice and thick-boned with a solid low-frequency range. At the time of recording, the band had no compressors, EQs, or reverbs, so they recorded with a dry sound with no processing whatsoever. The sound was ported from Pro Tools to StudioOne5, which has better sound quality and allows the use of various plug-ins, and detailed mixing was done at STUDIO YOU and Kansai University’s Socio-Acoustic Studio. The mastering process was also unique in that it was done using a Studer half-inch analog tape recorder, resulting in a sound that is hard to believe was recorded at home with amateur equipment, and bringing back the atmosphere of 1980.
While the original mix was completed in one all-nighter, this time around, we spent about two months on the remix and mastering process, which is a bit geeky, but let me share with you the details of this remix and mastering process.
Digital Editing ~ Analog Mixing
The data, which had been successfully digitized from an 8ch 1/2″ analog multi-tape at a high resolution of 24bit/96KHz, was transferred to Pro Tools and began the pre-mix editing process. First, independent tracks were created for each instrument and vocal. Since there were only eight tracks available, for example, a guitar solo was placed on the same track as the vocals, but they were separated into independent tracks so that mixing could be done smoothly. Next, noise was removed from the parts that were not being played. In addition, since the brass section was a bit flat in the original, a digital plug-in was used to adjust the pitch. After these preparations were complete, we began the mixing process using analog equipment.
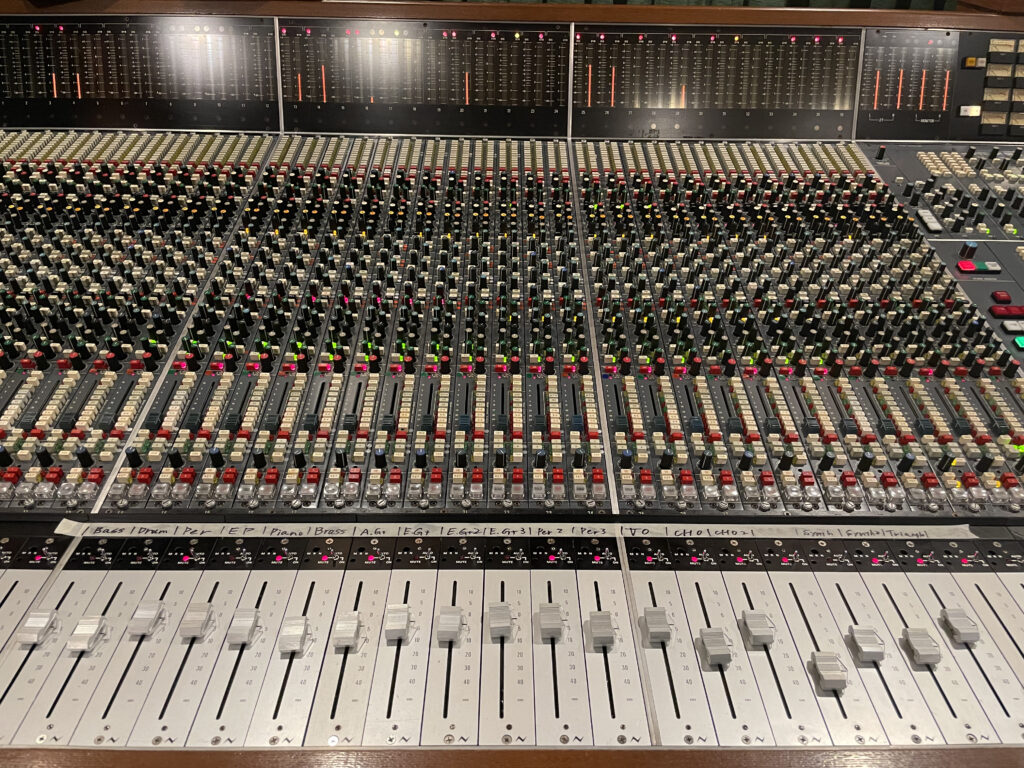
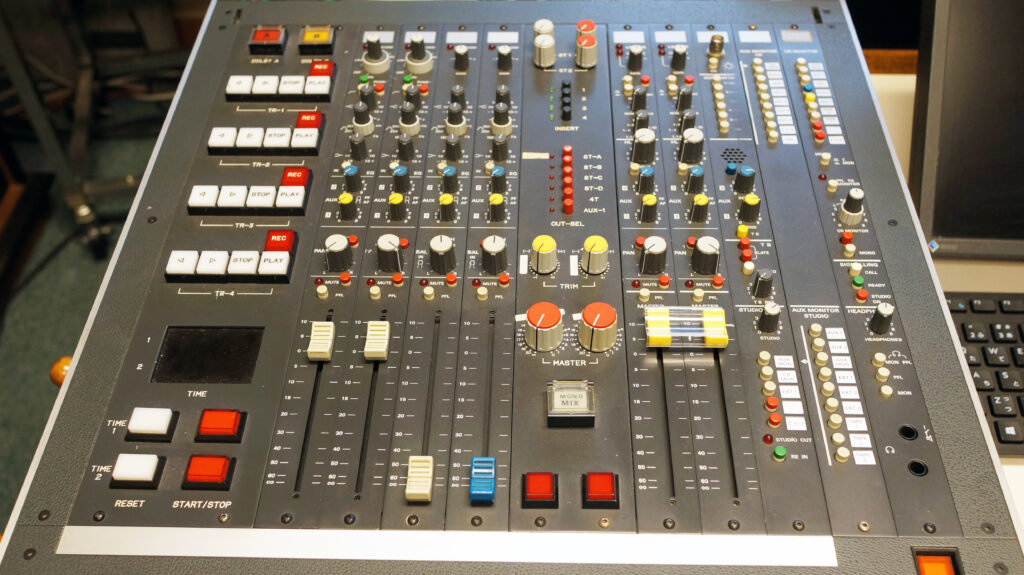
At the heart of the mixing console is the Neve v3, an analog console founded by British engineer Rupert Neve that, along with the SSL, became the standard in music studios worldwide from the late 1960s to the early 1980s.
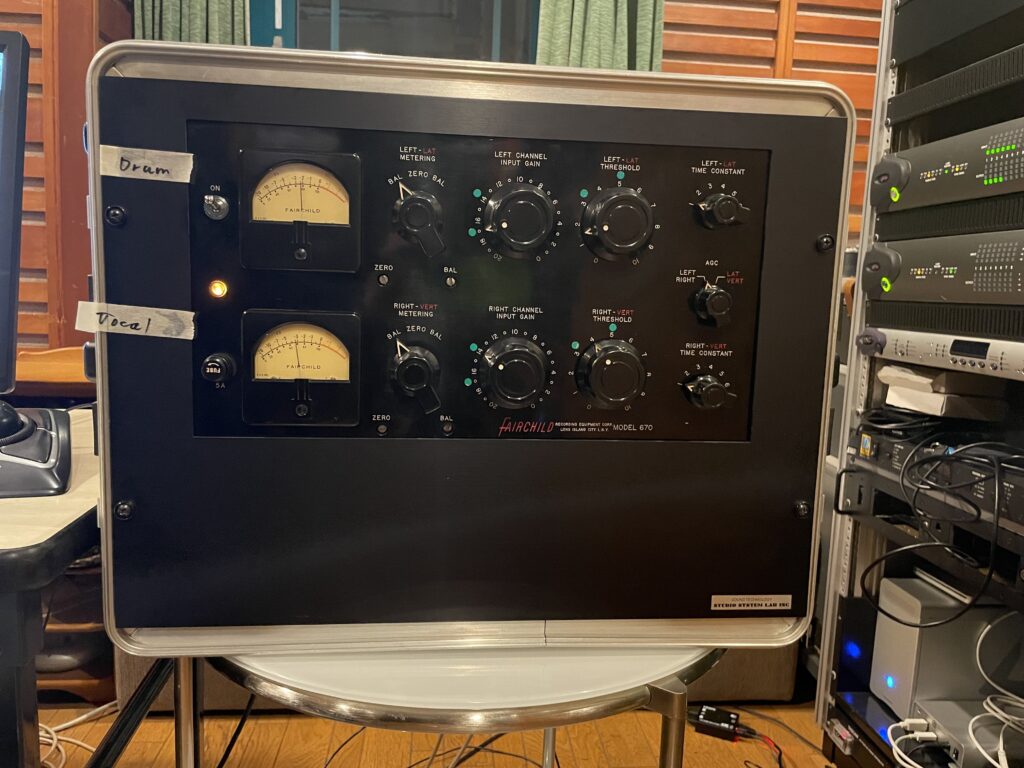
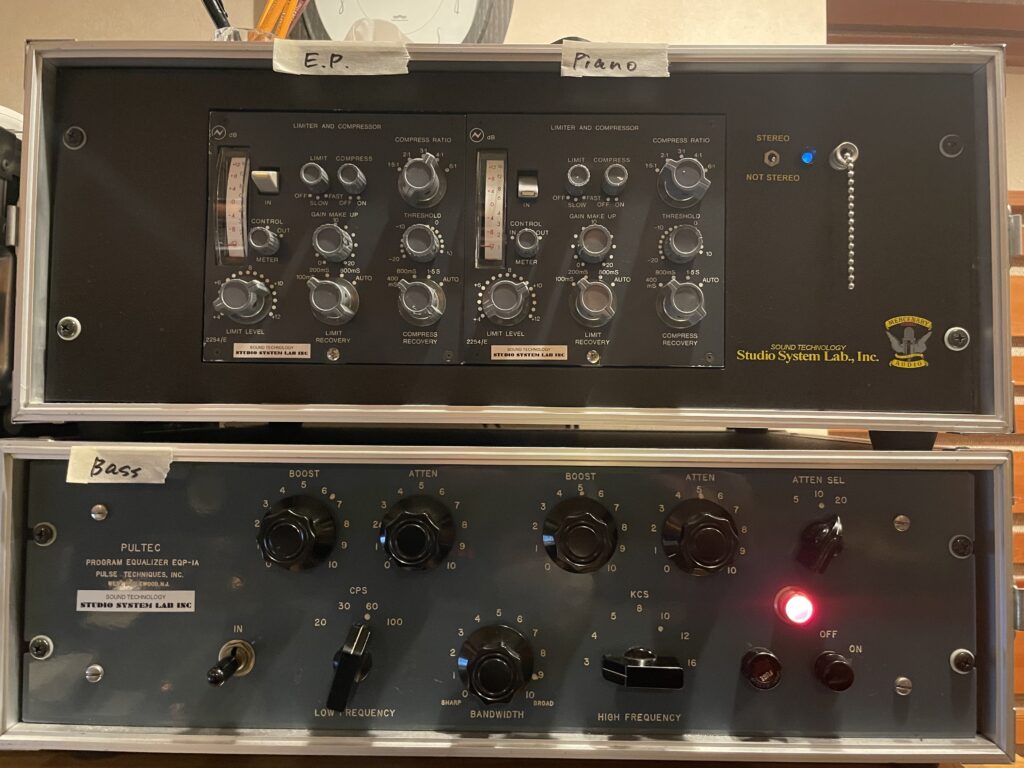
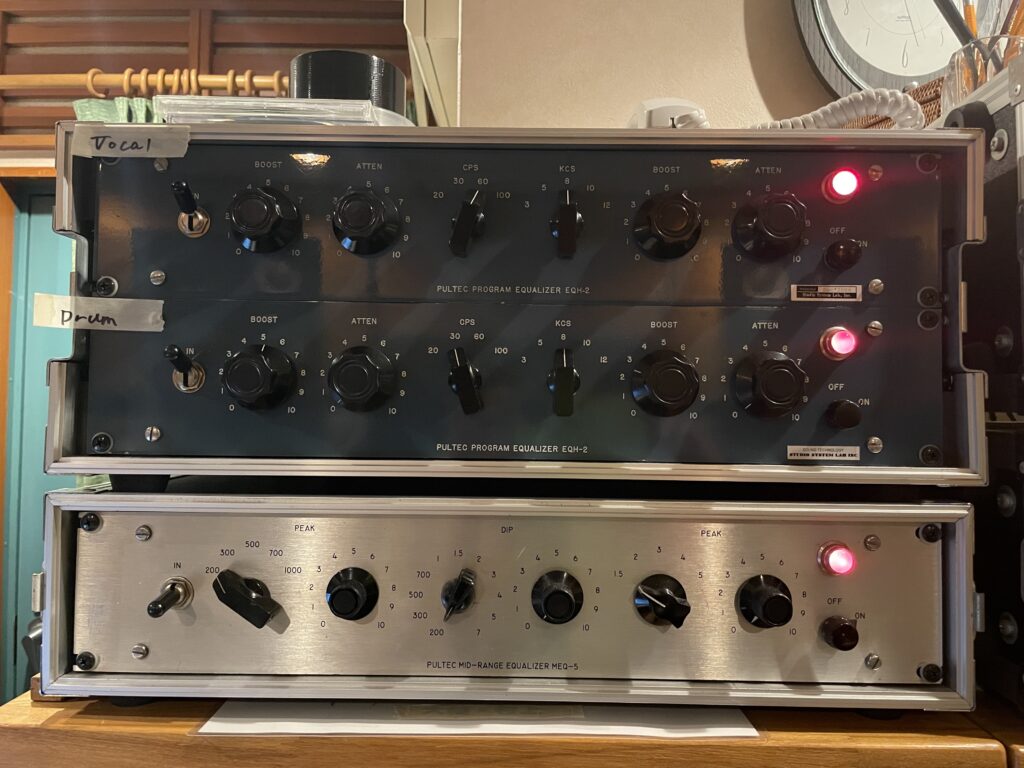
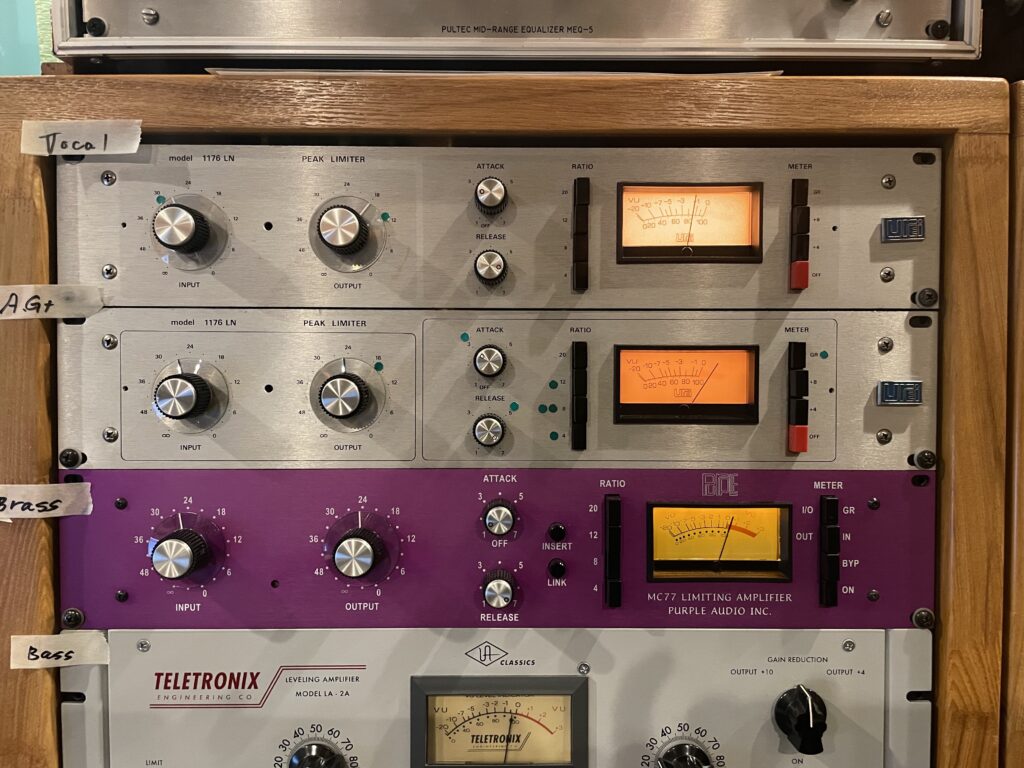
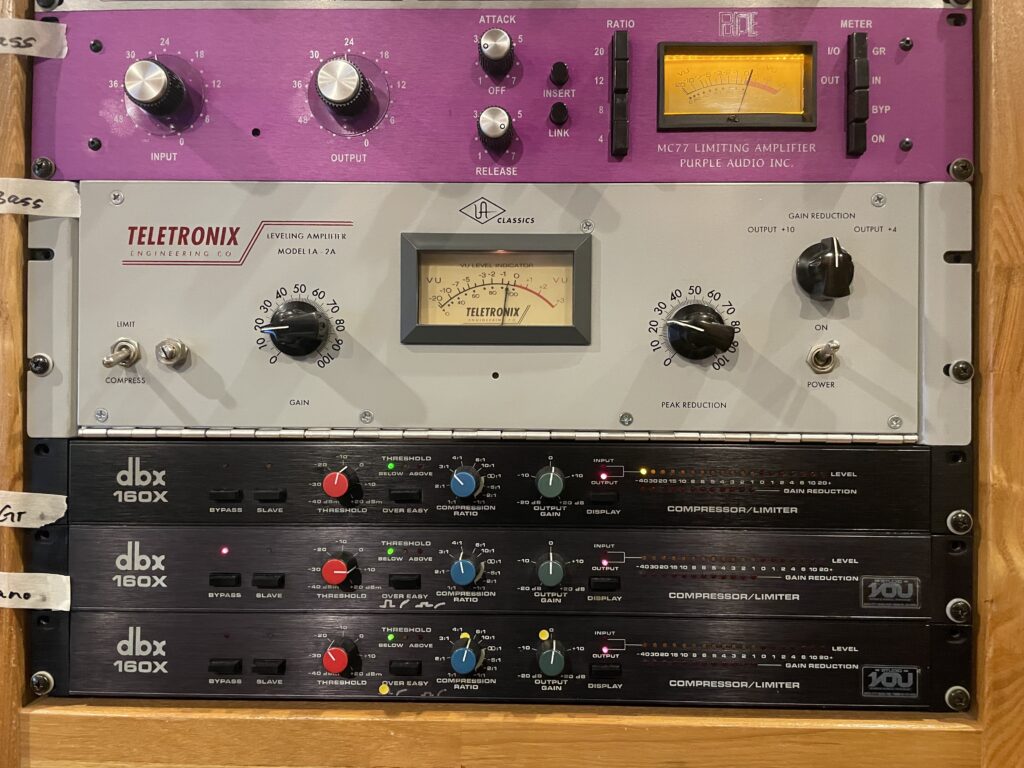
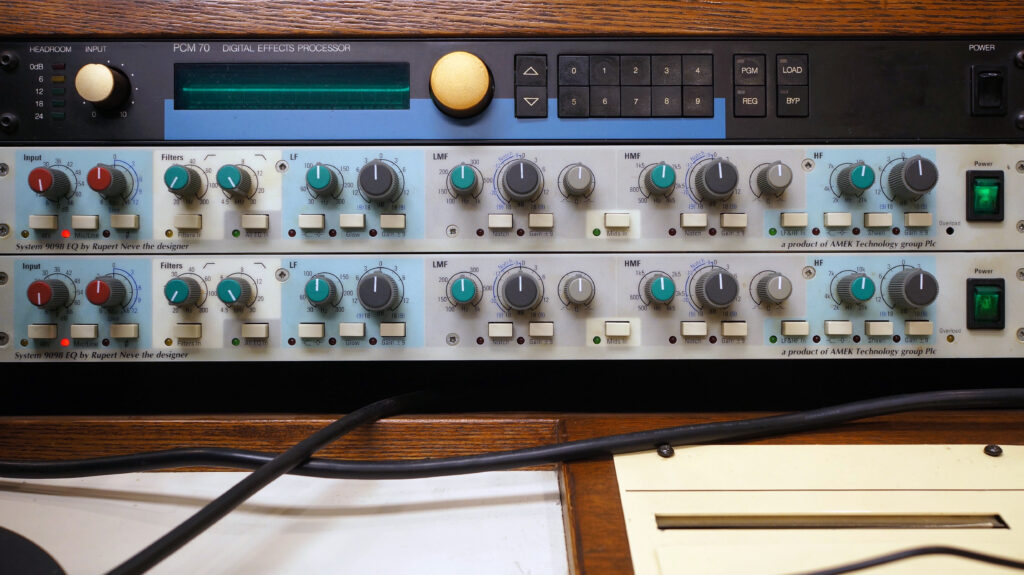
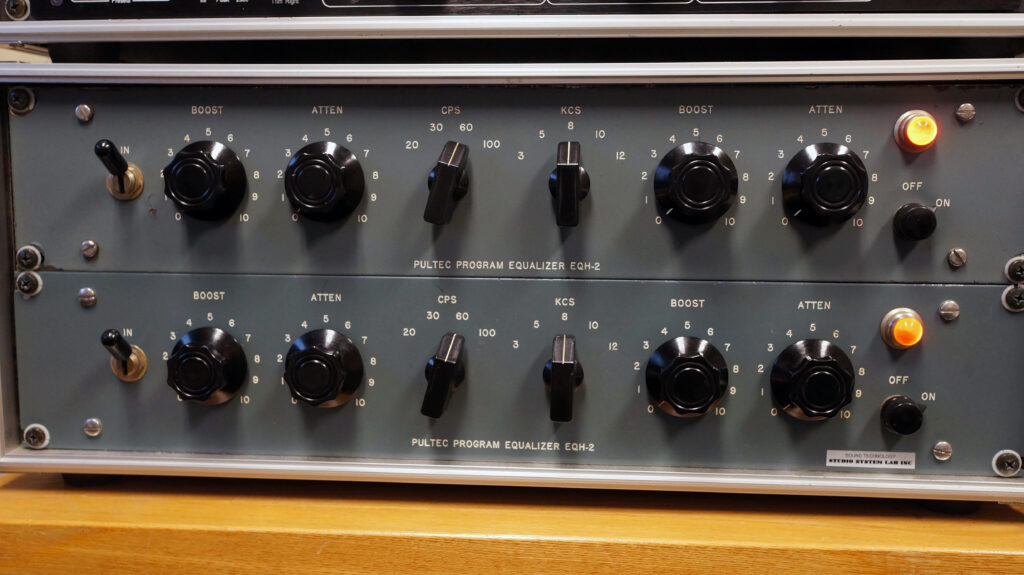
You may think that mixing means balancing instruments and vocals. While this is true, the main task of the analog mixing process is to adjust the sound of each instrument and vocal. The mix policy was to make it sound good on its own, and to keep it simple with minimal effects and other processing. Particular attention was paid to the bass drums, which form the backbone of the entire mix. The basic sound was created using the EQ and comp on the Neve console, with minor adjustments made with the following vintage analog equipment. If you are interested, I recommend you look up the history of each device, for example, Fairchild comps were used in most of the Beatles’ recordings. (I guess they are quite a nerd.) Incidentally, EQ (equalizer) is used to increase or decrease certain frequencies, and compressor is used to adjust sound pressure, but both devices produce a sound with a unique character when put through them, although it is difficult to explain rationally. This is the interesting point of analog equipment.
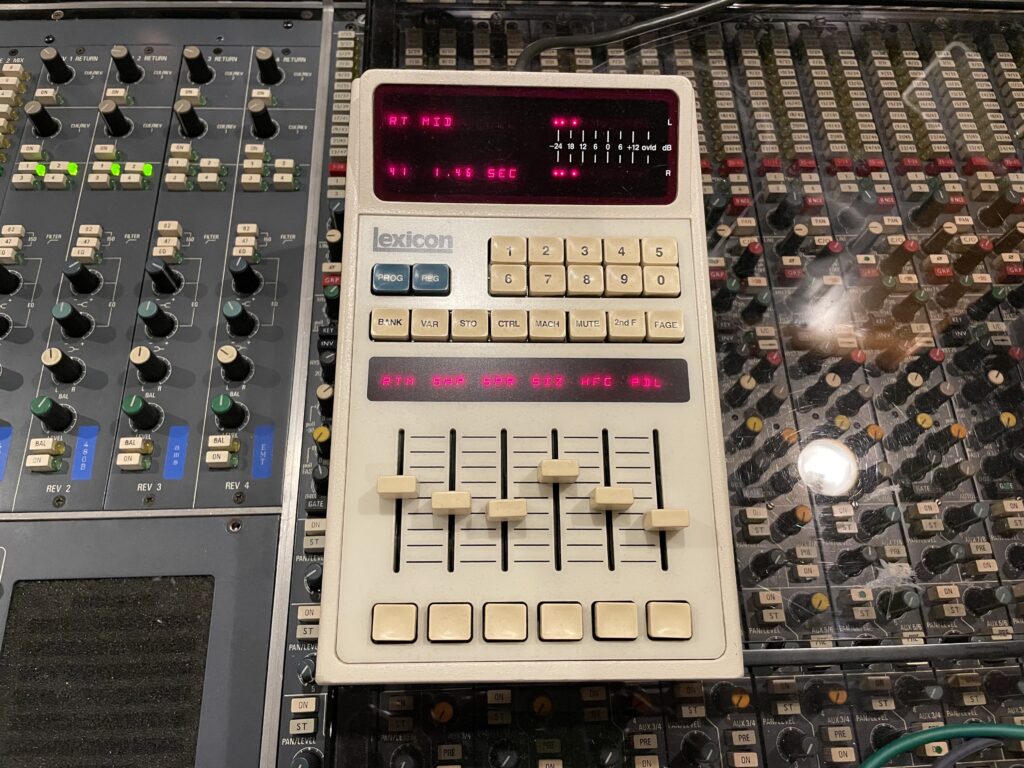
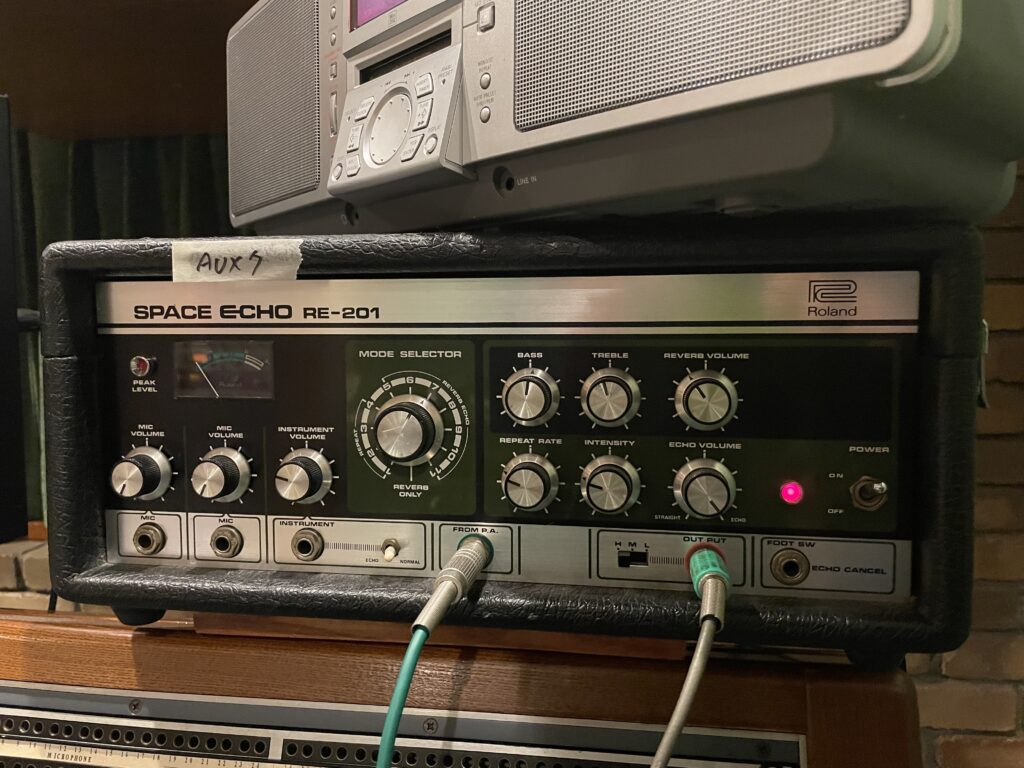
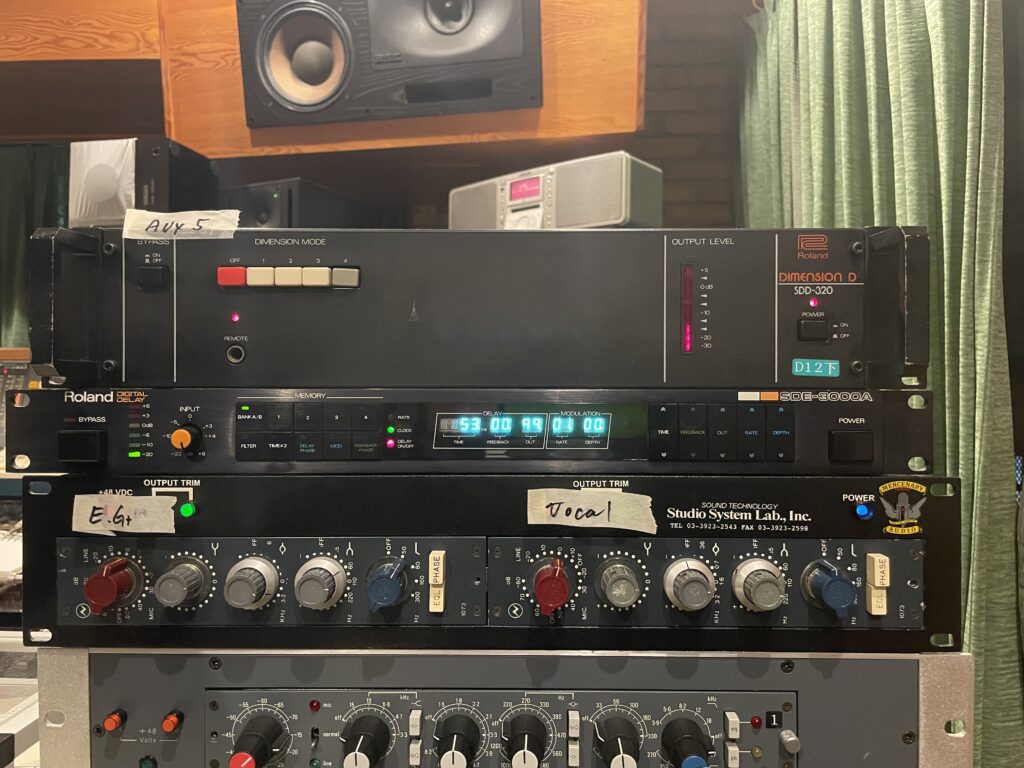
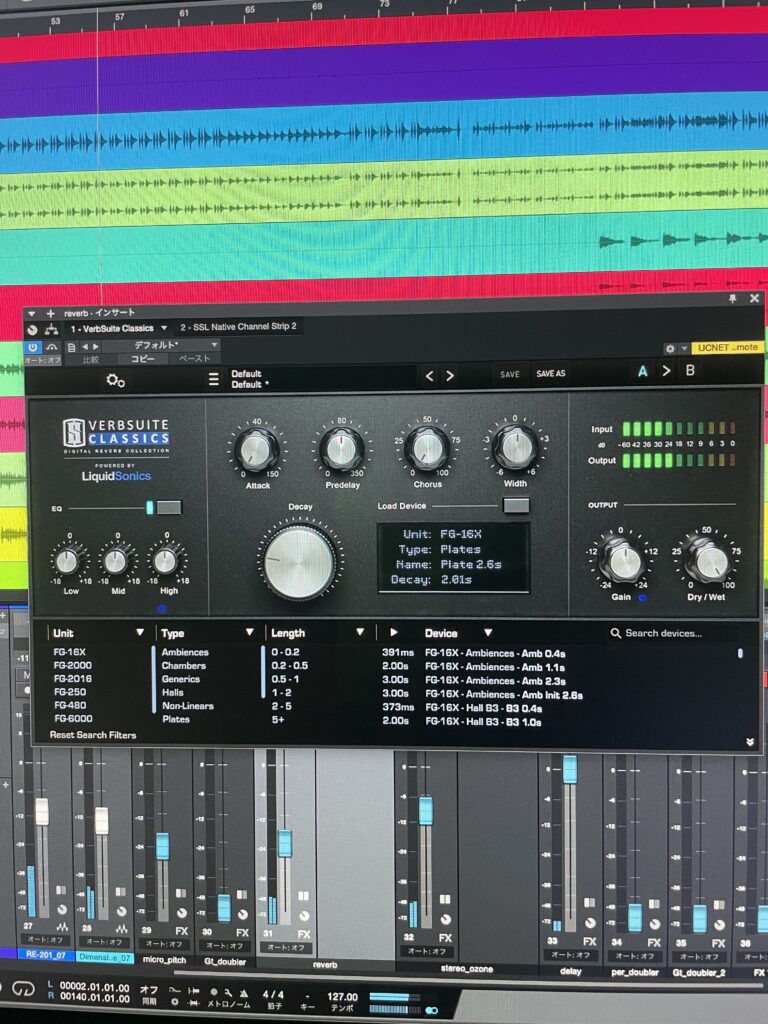
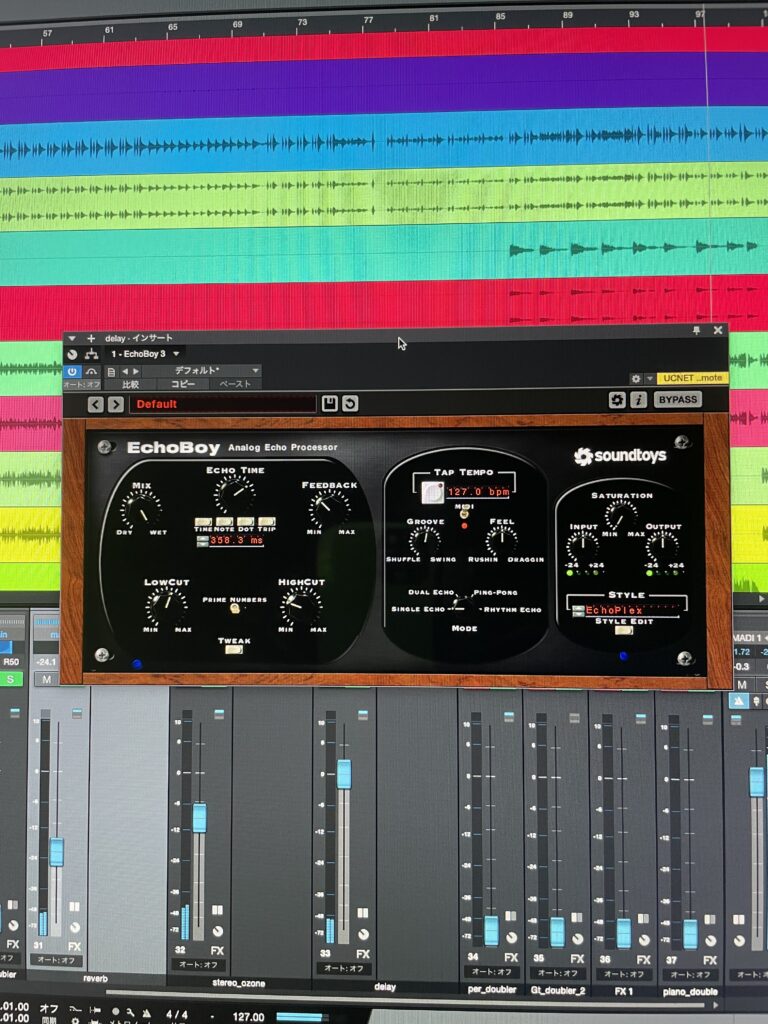
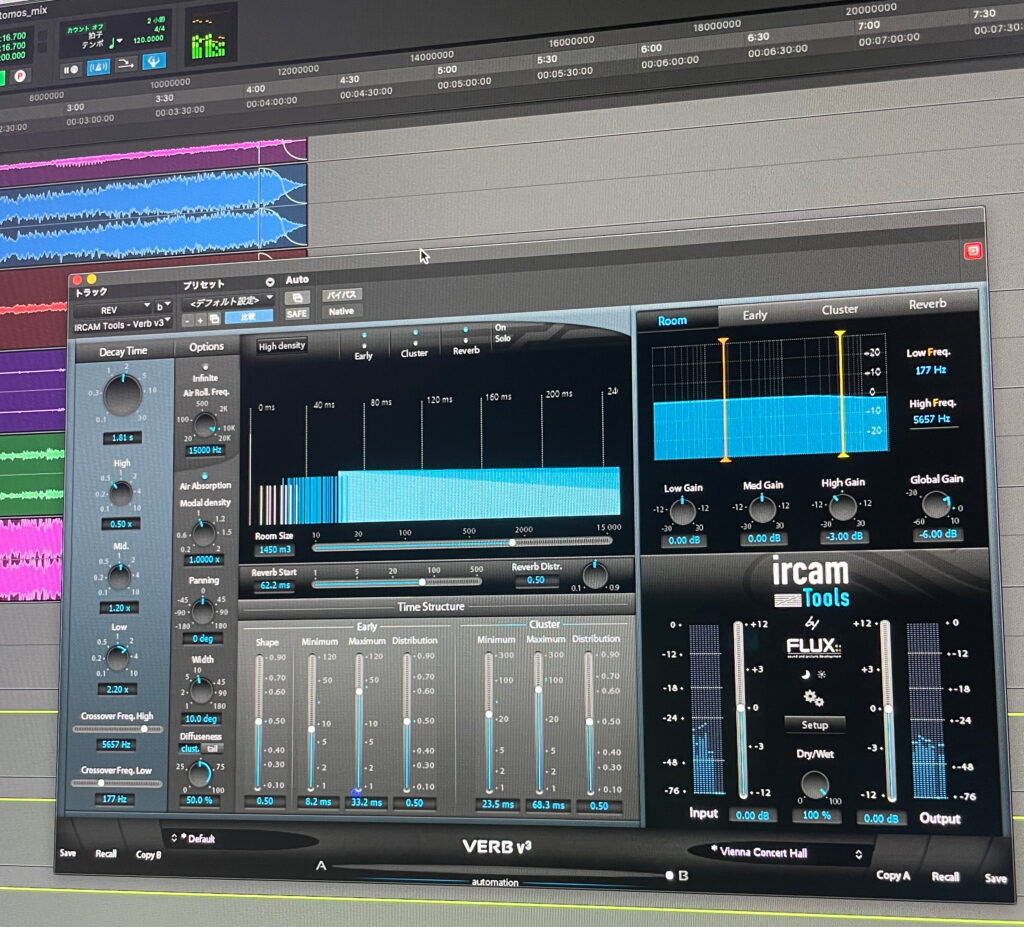
In culinary terms, the EQ and comp process is like the preparation of each ingredient to bring out its best flavor. If the ingredients are good, there is no need to do much to them, but it goes without saying that proper processing, seasoning, and presentation are important. The next process is the design of space through the addition of reverb, echo, and other reverberant sounds. Again, vintage equipment such as the EMT plate reverb was used, and since Pro Tools has no track limitations, the reverb component was recorded on a separate track and balanced during the mixing process. On the other hand, the original recording has only 8 tracks, so all sound sources are mono. Therefore, a Roland Dimension device was used to bring out the spatial expansiveness of the electric piano and synth strings.
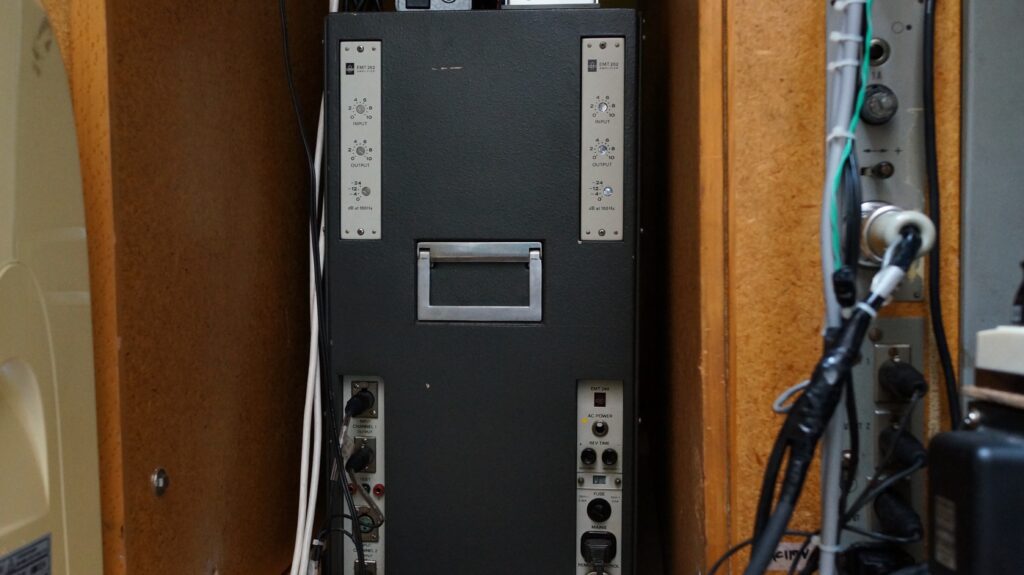
The far right is the IN/OUT section of the EMT140 (steel plate)
Digital Mixing
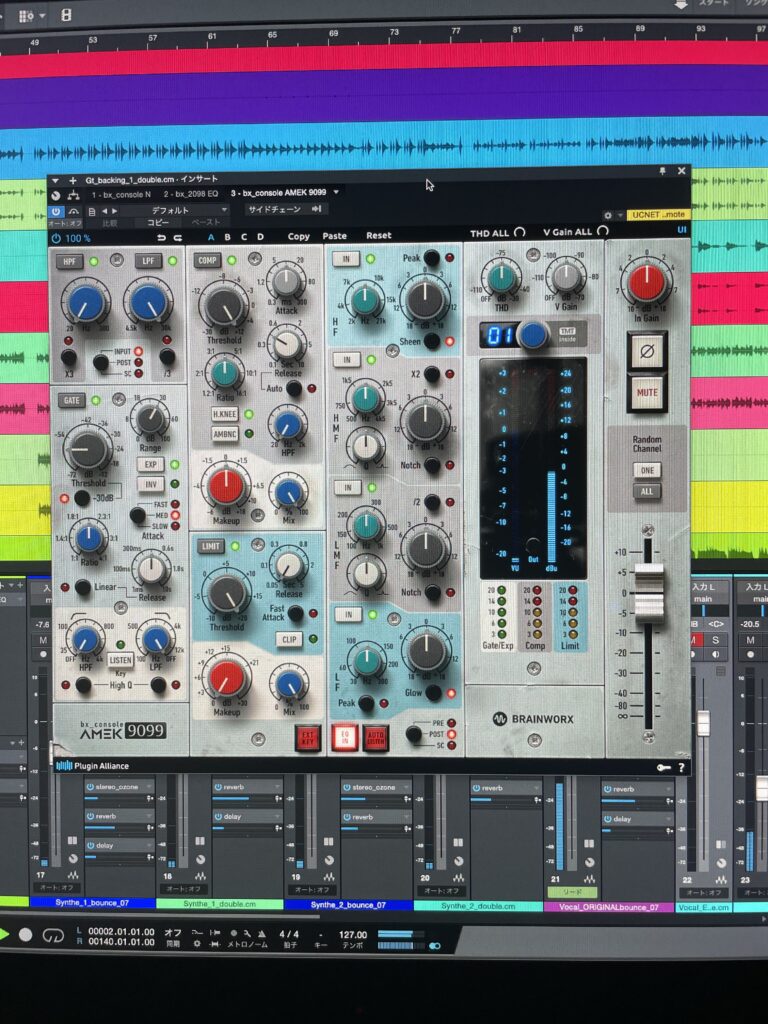
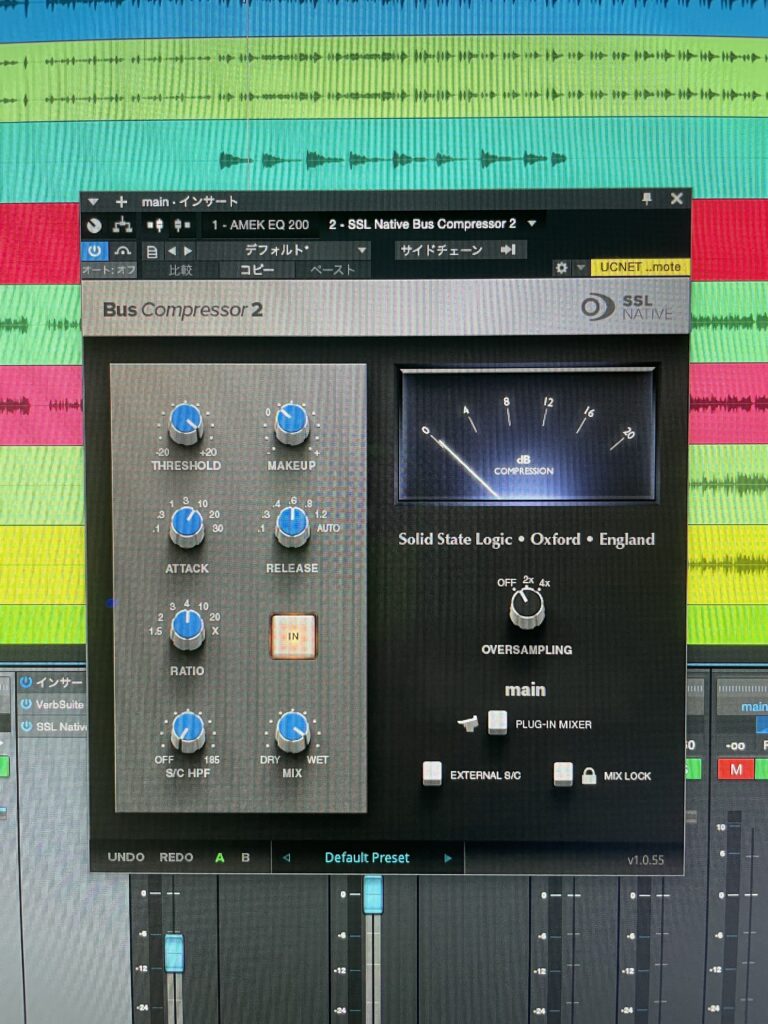
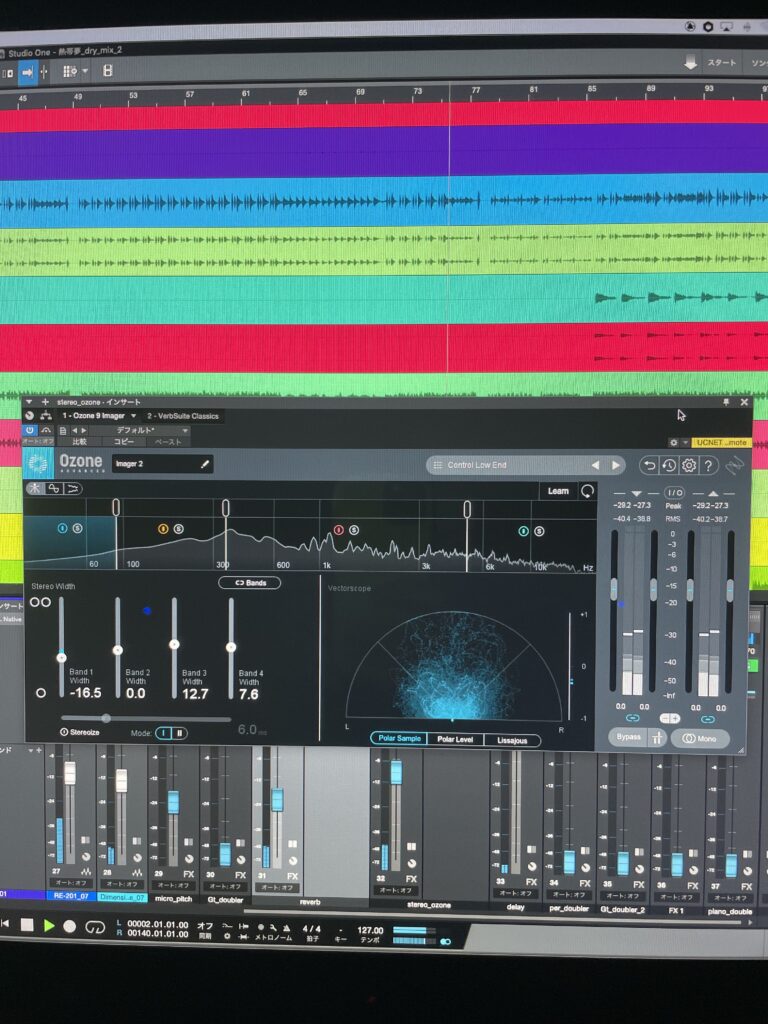
After the EQ, comp, and space design preparations were complete, the sound sources were transferred from Pro Tools to Studio One 5, a DAW, for the balancing and mixing process. DAW stands for Digital Audio Workstation and refers to music production software; Pro Tools is the standard DAW used around the world and is suitable for use as a tape recorder for editing work, while Studio One 5 is a new DAW that is integrated from sound source production to mastering. Studio One5 is a newer DAW that integrates everything from sound source production to mastering, making it ideal for artists to create their own one-stop shop.
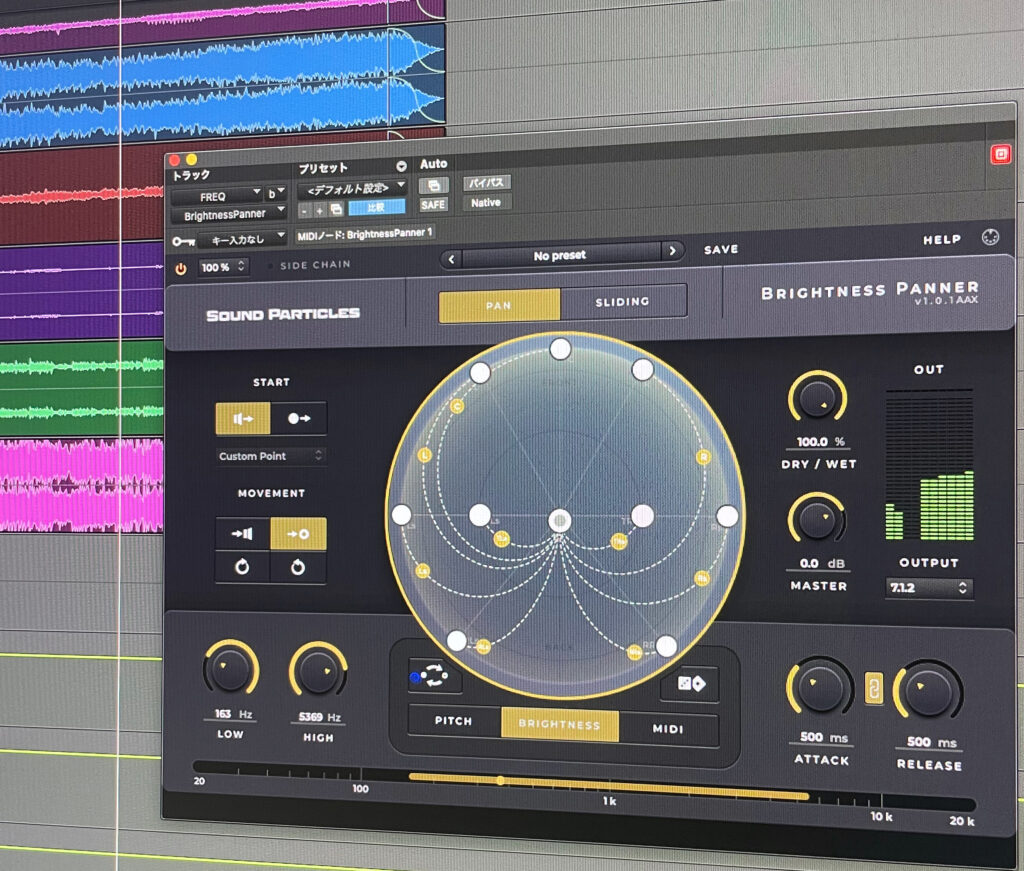
The basis of the mix is to determine the volume and panning (spatial localization) of the instruments and vocals. Vocals, solos, bass, and drums were centered, guitars were localized to the left and right, the electric piano and piano were spread out to the left and right, and the strings created with synths were made to encompass the entire sound. Various digital effects were then used to adjust and finish the mix master.
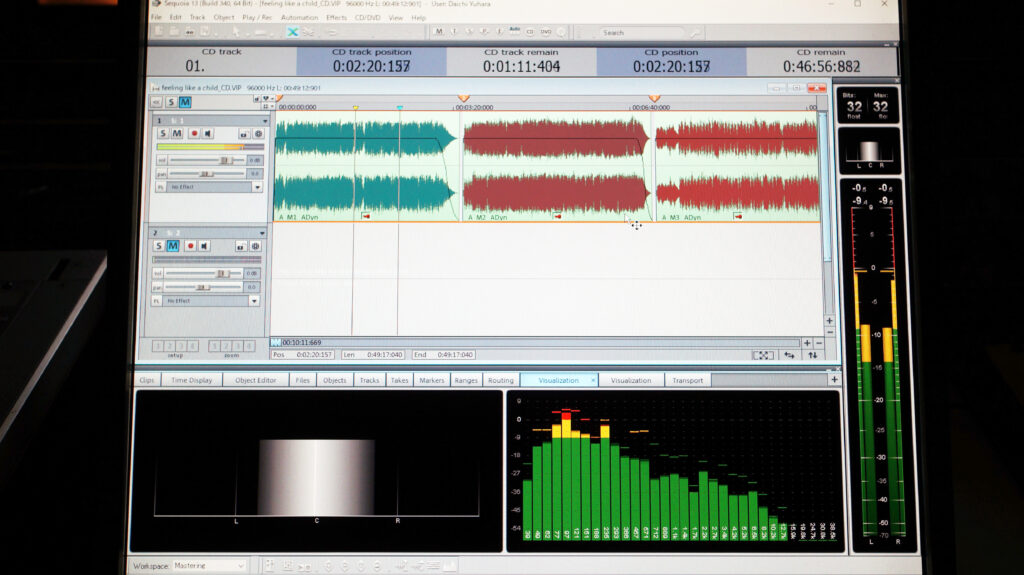
Mastering
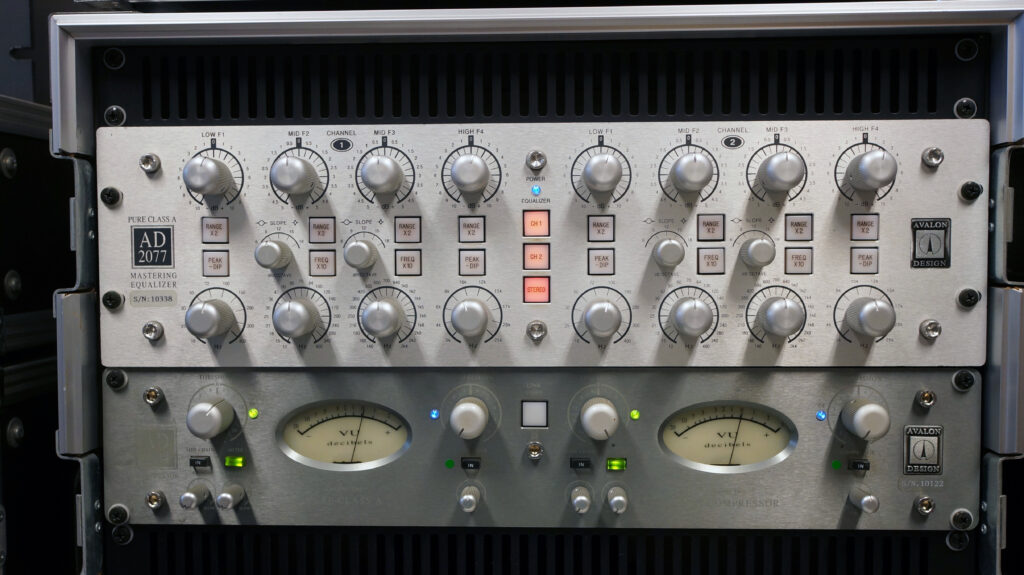
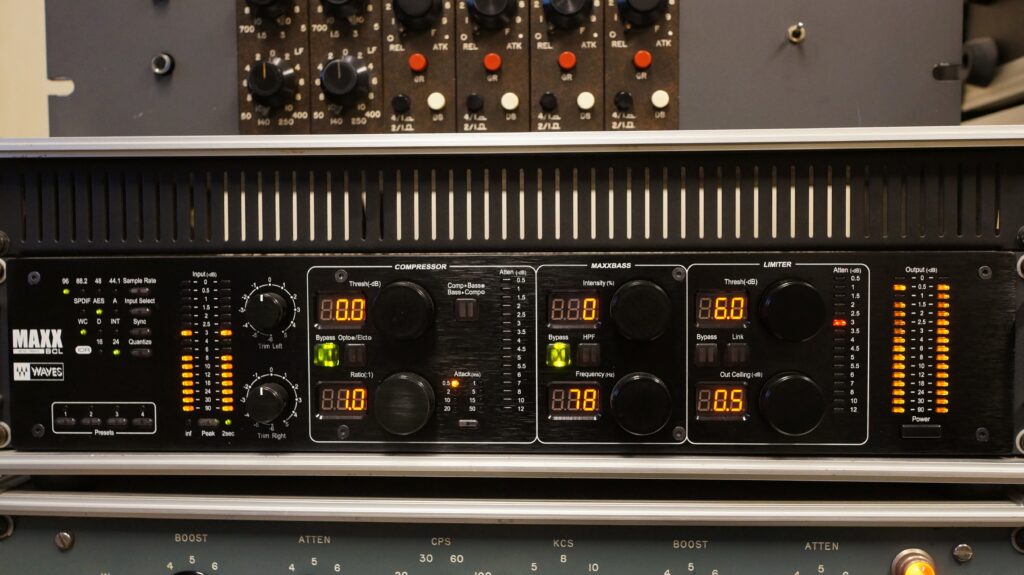
Once the mix master is created, the final process called mastering begins, in which the optimal sound pressure, EQ, etc. are adjusted for each format (vinyl, CD, digital distribution, etc.). Here, the equipment used in the process of converting the digital mix master to analog, adjusting it with various analog equipment, and then converting it back to a digital file is listed along with the signal flow.

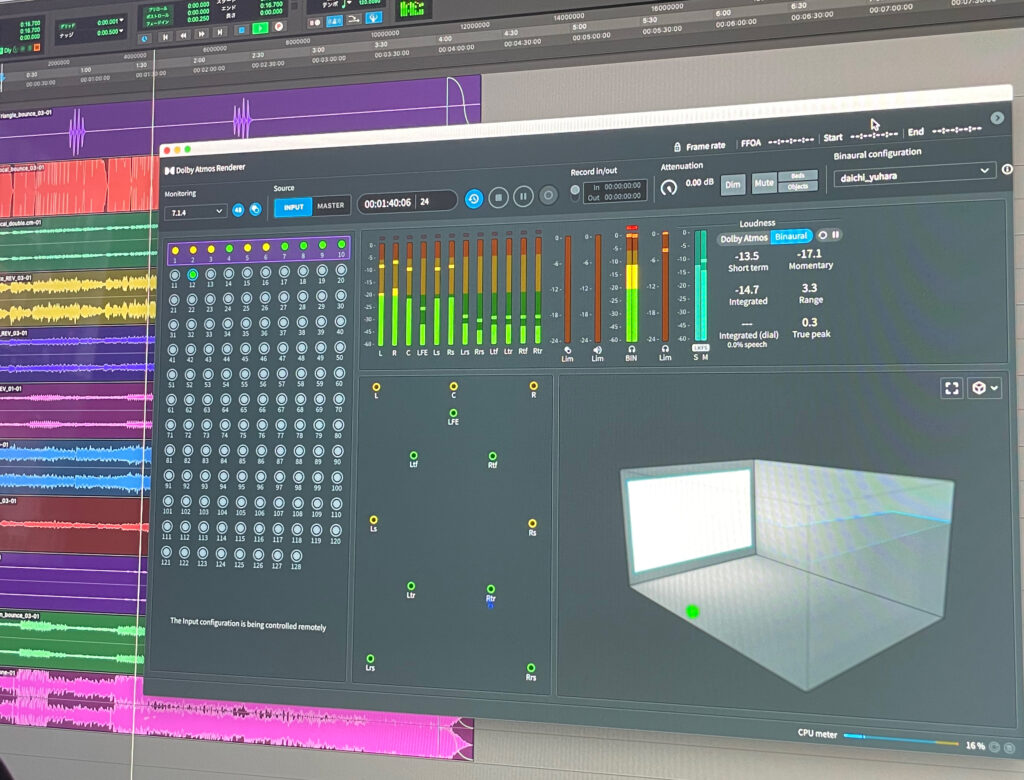
Spatial audio (Dolby Atmos)
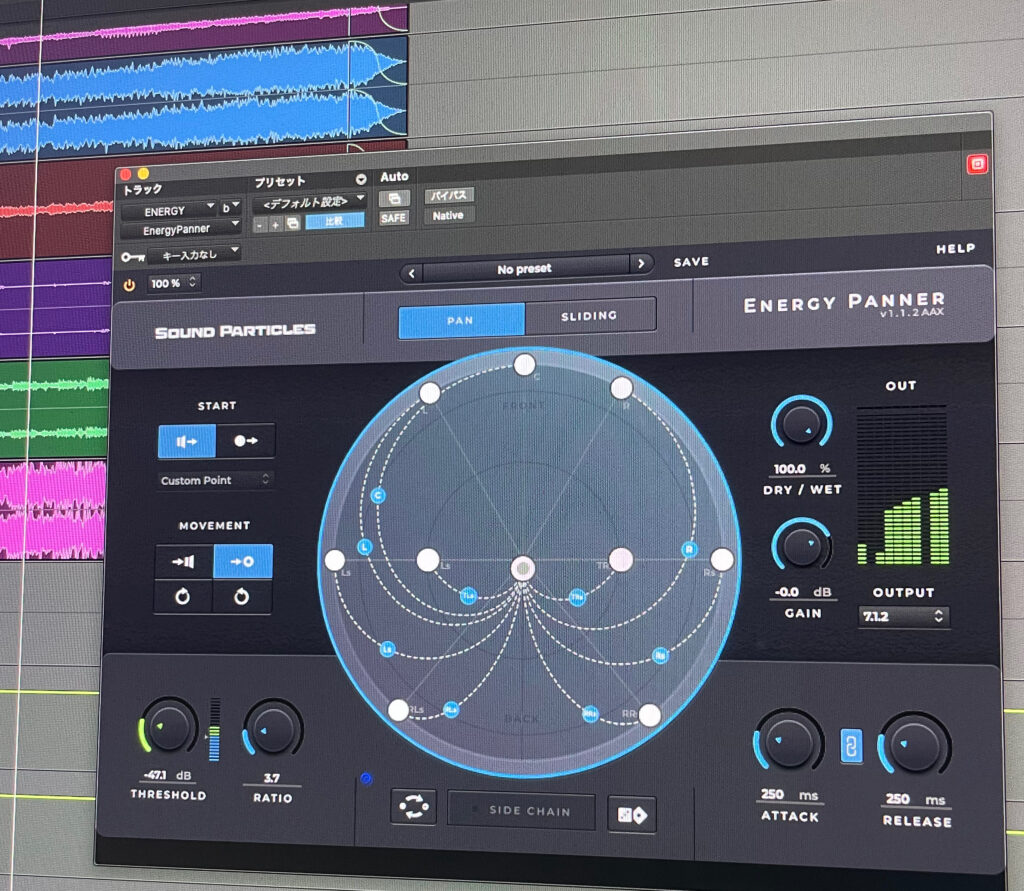
The long journey of the production story is finally coming to an end, but we hope you will stay with us just a little longer: we worked with Dolby Atmos (Apple Music’s spatial audio), a format that allows for a new acoustic experience. This work was done at Kansai University’s Socio Acoustic Studio, which was completed in 2016 and is capable of recording and playing back immersive audio (7.1.4).

Dolby Atmos is capable of reproducing not only a flat stereo sound field called LR, but also a 360-degree sound space (called immersive audio due to its immersive nature), and was first introduced in the world of movies. There are several formats of immersive audio, including Auro3D and 360 Reality Audio, but Dolby Atmos is the most popular because Apple is promoting it as spatial audio along with its AirPods Pro device. While immersive audio is well suited for conveying the realism of a live performance, it also has the potential for new spatial design of recorded sound sources, and when checked with the Air Pods Pro, the soundstage was not only expanded, but each individual instrument and vocal were better separated. In this case, a three-dimensional, enveloping sound field was created around the synths (strings) and electric piano. However, the progressive-rock style synth in the postlude of “Dim” and the synth sequence in the intro of “I’m Not Going to New York” use a gimmick of moving around in a 360-degree space, so please check them out.
In this way, I believe that the sound sources from the home recordings have been considerably refined using analog and digital equipment. Vinyl, CD, regular distribution, high-resolution distribution, and spatial audio (Dolby Atmos) Each has its own distinctive sound quality, and the music is rich in variety, so we hope you will enjoy listening to it from various angles.
I would like to thank again Mr. Daichi Yuhara, the engineer, for his long and careful response to my selfish requests. I would like to thank Mr. Masato Komatsu of HMV record shop for giving me this precious opportunity, Mr. Yukiya Iwata for connecting me, and Mr. Hirohisa Nakamura of 4TR for coordinating the CD, illustrations, and artwork. I am truly honored to thank Mr. Hiroshi Nagai for the wonderful illustrations, Mr. YOXXX for the artwork, Mr. Yoshitaka Minami for his delightful comments, and Mr. Hitoshi Kurimoto for writing the fascinating liner notes.
I am happy to have been able to leave such a work with Kiyo, who has been watching over me from afar, and the rest of the Presents friends who have gone through the same era. Thank you!